Essential Techniques for Embedding Mica Sheets in Epoxy Resin Crafts
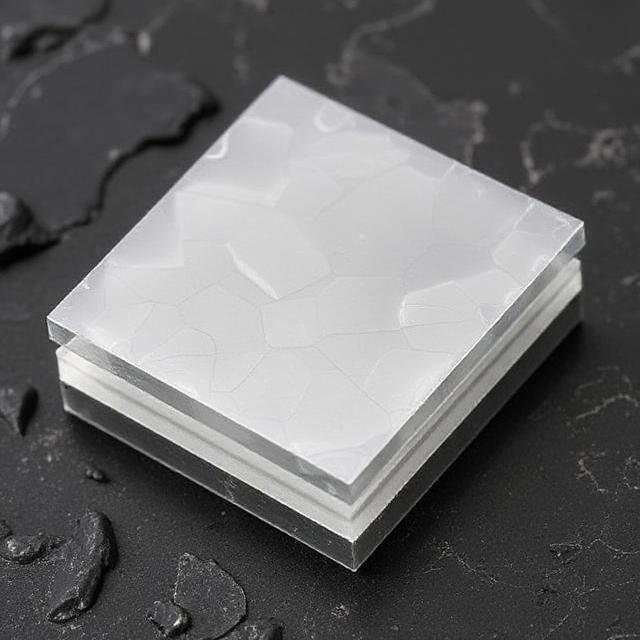
Mica sheets, with their natural iridescence and delicate texture, add a unique touch to epoxy resin crafts. When embedded properly, they create stunning visual effects, from shimmering accents to layered landscapes. Mastering the embedding process requires attention to detail, from preparation to finishing. Here’s how to achieve professional results with mica sheets in resin art.
Preparing Mica Sheets for Embedding
Selecting and Cutting Mica Sheets
Mica sheets come in varying thicknesses, typically ranging from 0.1mm to 0.5mm. Thinner sheets are more translucent, allowing light to pass through and create a subtle glow, while thicker sheets offer a bolder, more opaque appearance. Choose sheets that align with your design vision—whether you want soft, diffused effects or sharp, defined edges.
When cutting mica sheets, use sharp, non-metallic scissors or a craft knife to avoid jagged edges. For intricate shapes, trace the design onto the mica with a fine-tip marker before cutting. Always handle mica gently to prevent cracks or tears, as its layered structure can be fragile.
Cleaning and Priming the Surface
Before embedding, clean the mica sheets to remove dust or oils that could interfere with resin adhesion. Wipe them gently with a lint-free cloth dampened with isopropyl alcohol, then let them air-dry completely.
For better adhesion, some artists lightly sand the back of the mica sheets with fine-grit sandpaper (400–600 grit). This creates a rough surface that helps the resin grip the mica, reducing the risk of delamination. After sanding, wipe away any residue with alcohol again.
Mixing and Pouring Resin for Mica Embedding
Choosing the Right Resin Type
Not all epoxy resins are created equal. For embedding mica sheets, opt for a low-viscosity, crystal-clear resin that flows easily and self-levels. High-viscosity resins may trap air bubbles or fail to fully surround the mica, leading to uneven coverage.
If your project requires a flexible finish, consider a UV-resistant polyurethane resin, which remains stable under prolonged sunlight exposure. For indoor decor pieces, standard epoxy resin works well, provided it’s mixed and cured according to the manufacturer’s instructions.
Layering Resin and Mica for Depth
To create dimensional effects, pour resin in thin layers, embedding mica sheets between each pour. Start with a base layer of resin (about 3–5mm thick) and let it cure partially until it reaches a gel-like consistency. This “soft cure” stage prevents the mica from sinking to the bottom.
Place the mica sheets onto the semi-cured resin, arranging them as desired. Gently press them down to eliminate air pockets. Pour the next layer of resin over the mica, ensuring full coverage. Repeat this process for multi-layered designs, allowing each layer to cure partially before adding the next.
Troubleshooting Common Issues in Mica-Resin Projects
Preventing Air Bubbles Around Mica
Air bubbles are a common challenge when embedding mica sheets, especially if the resin is poured too quickly or the mica has rough edges. To minimize bubbles:
- Use a heat gun or torch: After pouring resin, pass a flame briefly over the surface to burst surface bubbles. Keep the heat source moving to avoid overheating.
- Pour resin slowly: A steady, thin stream reduces turbulence, which can trap air.
- Pre-degas the resin: If working with large batches, mix the resin and hardener, then let it sit in a vacuum chamber for 5–10 minutes to remove trapped air before pouring.
Avoiding Mica Discoloration or Fading
Mica sheets can lose their luster if exposed to direct sunlight or harsh chemicals over time. To protect their color:
- Seal the mica: Before embedding, coat the mica sheets with a thin layer of clear acrylic sealer to create a barrier against UV rays and resin chemicals.
- Use UV-resistant resin: Opt for a resin formula that includes UV inhibitors to slow down fading.
- Display projects away from sunlight: If possible, place finished pieces in shaded areas or use UV-filtering glass frames.
Fixing Uneven Resin Coverage
If resin pools unevenly around mica sheets, creating lopsided or exposed edges, follow these steps:
- Adjust the pouring angle: Tilt the mold slightly during pouring to encourage resin to flow evenly around the mica.
- Use a toothpick or stir stick: Gently guide resin into gaps around the mica after pouring.
- Add a final topcoat: After the initial layers cure, pour a thin, even topcoat of resin to smooth out any imperfections.
Enhancing Mica-Resin Crafts with Additional Elements
Combining Mica with Other Materials
Mica sheets pair beautifully with other embellishments, such as dried flowers, glitter, or metal flakes. To incorporate these elements:
- Layer strategically: Place delicate items like flowers between resin layers to preserve their shape.
- Use mica as a backdrop: Arrange glitter or metal flakes on top of mica sheets to create a contrasting sparkle.
- Experiment with opacity: Mix translucent and opaque mica sheets to add visual interest.
Adding Color to Resin for Vibrant Effects
While mica sheets offer natural shimmer, you can enhance their appearance by tinting the resin with alcohol inks, acrylic paints, or mica powders. Keep in mind:
- Alcohol inks: Create translucent washes of color that allow the mica to show through.
- Acrylic paints: Use sparingly for opaque accents, as too much paint can cloud the resin.
- Mica powders: Dust a small amount onto the resin surface before curing for a metallic sheen that complements embedded mica sheets.
Final Tips for Successful Mica-Resin Embedding
- Work in a dust-free environment: Even tiny particles can mar the finish of your project. Cover your workspace with a clean cloth and wear lint-free gloves.
- Monitor curing conditions: Resin cures best in a warm, dry room (around 70–75°F or 21–24°C). Cold temperatures slow curing, while humidity can cause cloudiness.
- Practice patience: Rushing the process leads to mistakes. Allow each layer to cure fully before moving on to the next.
By mastering these techniques, you can create mica-resin crafts that captivate with their luminosity and texture. Whether you’re making jewelry, coasters, or wall art, the interplay of mica and resin offers endless creative possibilities.